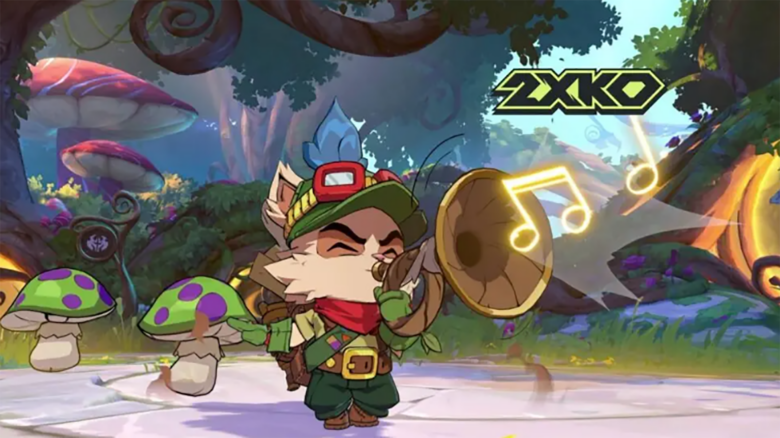
You face a character in 2XKO who relies on unusual tools and careful control of space. Teemo challenges your decision-making by forcing you to navigate traps, ranged pressure, and constant movement, which explains why competitive players often select him in high-level play.
You will recognize many of Teemo’s core ideas from his League of Legends origins. He still focuses on ambush tactics, lingering hazards, and steady chip damage, with adjustments that fit a tag-based fighting game, including new mobility options that change how you manage positioning.
Teemo’s Match Strategy in 2XKO: An Unconventional Zoning Approach
You play Teemo as a space-control specialist who wins by shaping the screen. You want opponents far away, forced to move through hazards while you attack from safety. Instead of relying on standard projectiles, you build a layered setup with traps, altered terrain, and delayed pressure.
You should always think about the battlefield, not just the opponent. Mushrooms and bushes define where fights happen. Once you establish them, you dictate movement and pace.
Teemo’s badge system rewards consistency. Each successful hit improves your tools, and that progress carries into later rounds. You benefit from steady pressure rather than risky bursts.
Start interactions with 5L shots to nudge opponents backward. Follow with Noxious Trap (S2) to widen the gap. Mushrooms can chain together, so you can threaten space far beyond their initial placement.
Use Sharpshooting Scout (S1) as your main damage tool. Vary charge timing to disrupt blocking habits. Add the 2S2 version for vertical control, especially when opponents try to jump over traps. Shots bouncing off mushrooms create angles that are difficult to contest.
Place Guerrilla Tactics (2S2) bushes often. You can teleport back to them to avoid scrambles or escape corner pressure. This option lets you reset neutral instead of trading hits.
Stay mobile in the air with j.8 Parachute. Floating changes your timing and keeps you out of close-range threats. It also buys time for traps to activate and cooldowns to recover.
When you confirm a strong opening, you can chain both Supers for reliable damage. Use Noxious Surprise first, then cancel into Bandle Sky Patrol. This sequence rewards proper setup rather than raw speed.
| Core Objective | Tools You Use |
|---|---|
| Control space | Mushrooms, charged shots |
| Avoid pressure | Bush teleport, Parachute |
| Convert damage | Super chaining |
How Assists Support Teemo’s Game Plan
You rely on assists to protect space when opponents force their way in. Exploding mushrooms punish reckless approaches, but determined rushdown still needs answers.
Call a wide, horizontal assist when you float with Parachute. This clears the screen and gives you time to reset traps. You immediately regain control instead of scrambling.
Characters like Yasuo and Ekko complement this plan well. Their assists cover large areas and interrupt forward movement. You use that window to rebuild your zoning structure and return to safe pressure.
You should treat assists as defensive tools first. Once space belongs to you again, your trap-based offense resumes naturally.
Teemo’s Strengths in 2XKO: Traps and Ranged Pressure
You control space well by forcing opponents to respect constant projectile pressure. Teemo’s kit lets you attack safely while staying outside common threat ranges.
Key advantages
- Mushroom traps punish movement and shape neutral by denying lanes and jumps.
- Extended slingshot shots gain extra reach when traps sit on the field.
- Floating shots alter timing, which makes blocks and parries less reliable.
When pressure breaks down, bush teleport gives you a reliable escape option. You can reset positioning and avoid corner pressure without committing to risky reversals.
Weaknesses: Low durability and limited normal reach
You operate with one of the smallest health pools on the roster, so heavy hits swing rounds fast. Rushdown fighters that thrive up close punish mistakes hard, and you cannot afford repeated trades. You must value spacing because a single clean confirm can erase your momentum.
Your normal attacks also create problems at close range. Their short reach, especially on low buttons, makes scrambles risky. You often need to rely on zoning tools to force openings before stepping in to convert.
Key drawbacks to manage
| Area | Impact on your play |
|---|---|
| Health | You lose rounds quickly after big confirms |
| Normal range | You struggle to contest tight footsies |
| Damage output | You need many hits to secure a KO |
You win through persistence, not raw power, so patience matters.
Badge Power-Ups: How You Strengthen Teemo During a 2XKO Match
You can enhance Teemo through a badge system that rewards specific actions during the fight. Each badge unlocks a combat modifier, but you begin the round with none of them active. You must earn them through consistent play.
| Badge Type | How You Earn It | What It Changes |
|---|---|---|
| Dart Badge | Land 10 Light dart hits or assists | Light attacks apply poison |
| Mushroom Badge | Trigger 10 Noxious Trap explosions | Projectiles gain fire, plus extra hitstun and blockstun |
| Slingshot Badge | Connect 5 Sharpshooting Scout hits | Mushroom explosions apply poison damage over time |
You face a clear tradeoff. Early pressure feels weaker, but each badge directly boosts your zoning output. As you stack these effects, your traps and projectiles control space more reliably and force slower responses from opponents.
The best buttons to use when you play Teemo in 2XKO
You rely on a small set of normals and specials to control space and convert damage. Teemo rewards clean button choices more than fast scrambles, so press with intent.
Key normals
- 5L sets the pace. You use it to check movement, start pressure, and chain repeated shots from a safe range.
- 5H hits harder and fits cleanly into confirms. You press it once you know your offense connects.
- 2M carries risk if thrown out alone, but it works well after 5L connects to secure a hit.
You should avoid mashing these buttons. Space them to keep opponents at the edge of your comfort zone.
Core specials
- S1 serves as your main damage and zoning tool. The slingshot defines your neutral and anchors most conversions.
- S2 lets you place mushroom traps that discourage approaches. You create room to fire S1 without pressure.
- 2S2 plants a bush that enables quick escapes. After a short delay, you turn invisible inside it, which opens ambiguous follow-ups. Burning the bush speeds this effect and supports extended air control with the parachute.
Unique mobility and supers
- j.8 activates the parachute. You float to alter timing, pair it with horizontal assists, and reset spacing.
- S1+L/M/H and S2+L/M/H amplify damage. You use these supers to finish confirmed hits, not to gamble in neutral.
Combos of 2XKO Teemo
You rely on efficient confirms and repeatable air routes to keep damage consistent. Teemo’s combo structure rewards clean jump cancels, steady timing, and awareness of screen position rather than risky extensions.
Common routing themes
- You often start from 5M or 2H and transition into jump-cancel strings.
- Repeated j.2M hits stabilize opponents in the air.
- Enders like 3H, 2T, or Super 1 let you choose damage, tag utility, or positioning.
| Route Focus | Example Input Flow (Simplified) | Screen Position | Execution |
|---|---|---|---|
| Basic launcher route | 2H → jc → j.M → j.2M loops → j.2H → 3H | Anywhere | Easy |
| Meterless confirm | 5M → 2M → 5H → jc → air string → 3H | Anywhere | Easy |
| Air-special extension | 5M → 5H → jc → j.H → j.6S1 → re-jump | Anywhere | Medium |
| Stable midscreen | M → 2M → H → 2H → sj → j.M → j.2M chain → 3H | Midscreen | Easy |
| Delay-timed air loop | 5M → 5H → jc → j.M → delayed j.2M reps | Midscreen | Medium |
| Corner conversion | 5M → 5H → jc → S2 route → Super 2 | Corner | Medium |
You should treat midscreen combos as your baseline. These routes convert stray hits into reliable knockdowns without demanding strict delays. Focus on keeping opponents suspended with repeated j.2M inputs before committing to j.2H.
Anywhere combos emphasize flexibility. When you land 2H, immediately jump cancel and keep your air normals tight. Shorter strings reduce drops and still leave space for tag options or supers.
Corner routes give you more freedom to layer specials and supers. You can add S2 or Super 2 after airborne specials when spacing allows. Prioritize consistency over extra hits, especially in match play.
If you want smoother execution, practice jump height control and delayed inputs. Clean timing matters more than raw speed, and controlled reps make Teemo’s combo game dependable across team compositions.
Summary: Teemo in 2XKO
You play Teemo as a spacing-focused specialist who controls the screen while your partner threatens up close. You avoid constant pressure and instead rely on movement, patience, and planned interactions to create damage. Strong melee allies let you maintain distance while still converting openings.
You manage risk carefully, especially early in rounds. Teemo ramps up as you earn badges, but you start vulnerable and must protect space before momentum builds.
Key priorities
- Maintain safe ranges with traps and aerial mobility
- Stay active without overcommitting to offense
- Use tags to reset neutral and protect weak moments
- Build strength over time through consistent confirms
If you enjoy zoning, you may also gravitate toward Caitlyn or Jinx, who offer different takes on long-range control.