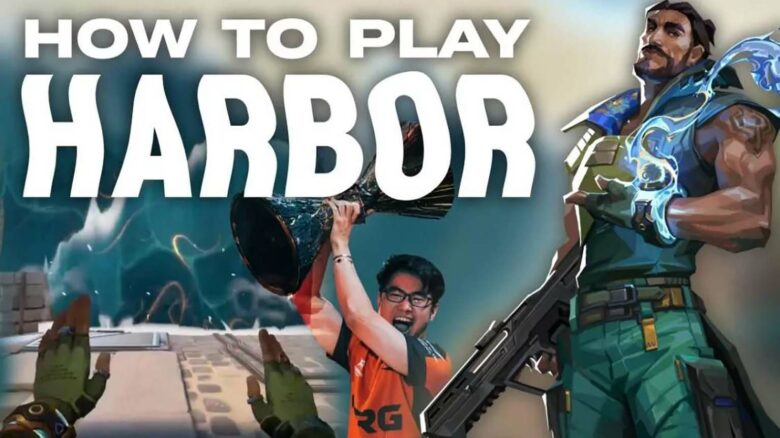
You play Harbor as one of VALORANT’s most unconventional Controllers. This Indian agent uses a reworked kit that combines standard vision-blocking smokes with aggressive crowd-control tools, letting you disrupt enemies while shaping the battlefield. His abilities allow you to slow and nearsight opponents in ways most controllers cannot.
You get the most value from Harbor when you treat him as more than a traditional smoke agent. His hybrid design pushes you toward coordinated, double-controller setups where you support primary smoke coverage and apply pressure with layered utility. When you lean into that role, you unlock his unique impact.
Harbor Abilities: What Does Harbor Do?
Harbor operates as an aggressive controller who blends vision denial with crowd control. You do not only block sightlines—you slow and nearsight opponents, forcing them into weaker duels. His toolkit fits best when you pair him with another controller, since his coverage favors tempo and disruption over static smoke uptime.
Storm Surge (C) – 200 Credits, 1 Charge Each Round
You equip and throw Storm Surge, creating a whirlpool that detonates shortly after landing. When it triggers, it nearsights and slows enemies caught inside for roughly two seconds.
Unlike traditional controller utility that simply obscures vision, this ability actively disrupts defenders. Enemies inside the radius struggle to reposition and lose visual clarity, which reduces their ability to trade or hold tight angles.
Key characteristics:
- Cost: 200 credits
- Charges: 1 per round
- Effect: Nearsight + movement slow
- Activation: Delayed detonation after impact
Use Storm Surge to clear close corners before your duelists swing. If defenders anchor common choke points, throw it directly onto their position to force them off the angle.
On defense, cast it at narrow entrances to delay a push while your team rotates. During post-plant situations, place it between a defender and the spike to disrupt their defuse timing and create pressure without exposing yourself.
Because the effect applies in an area, you can also combine it with other utility. Pair it with flashes or movement abilities so your team capitalizes while enemies struggle to see and move.
Cove (E) – Signature Ability, Remote Water Smoke, Reactivatable Shield (19.25s, 680 HP)
Cove functions as your signature ability and costs no credits. You place it remotely, similar to map-targeted smokes, allowing you to deploy it from relative safety.
Once active, Cove creates a spherical water smoke that blocks vision. You can then reactivate it to enable a destructible bulletproof shield around the smoke. The shield absorbs up to 680 HP before breaking, and the smoke lasts 19.25 seconds if left intact.
Core details:
| Feature | Value |
|---|---|
| Cost | Free (Signature) |
| Placement | Remote targeting |
| Duration | 19.25 seconds |
| Shield HP | 680 |
| Reactivation | Enables bullet-blocking barrier |
The shield mechanic makes Cove unique among controllers. When active, bullets cannot pass through until enemies destroy the barrier. This protection creates brief windows where gunfire cannot deny a plant or punish movement inside the smoke.
Use Cove aggressively during site takes. Drop it directly on the spike location and activate the shield as your teammate plants. The barrier forces defenders to either reposition or commit to breaking it before contesting.
In retake scenarios, deploy Cove on the spike and reactivate the shield to cover a defuse attempt. Since enemies must destroy the shield first, you gain extra time and pressure.
Do not activate the shield too early. If opponents are not shooting it, you waste durability. Trigger it when you expect immediate gunfire or when protecting a critical action.
High Tide (Q) – 300 Credits, 1 Charge Each Round
High Tide sends out a long wall of water that travels forward along the ground. You guide its path with your crosshair and can stop it early if needed.
Players who pass through the wall become slowed by 30%, including your teammates. Recent updates increased the wall’s height, improving its ability to block elevated sightlines.
Ability overview:
- Cost: 300 credits
- Charges: 1 per round
- Effect: Vision block + 30% slow on crossing
- Control: Steerable during deployment
High Tide allows you to reshape a site execute. Instead of placing a static smoke, you carve a curved barrier that divides defenders and isolates angles.
Guide the wall to cut off multiple sightlines at once. For example, split a bomb site so defenders cannot trade each other effectively. This forces isolated fights and favors coordinated pushes.
Be mindful of the slow effect on allies. If your team pushes directly through the wall, they move slower and may mistime their entry. Position the wall so your teammates emerge from the edge rather than running through its center whenever possible.
On defense, use High Tide to delay a full-site commitment. Enemies who force their way through become easier targets due to the movement penalty.
Reckoning (X) – Ultimate Ability, 7 Points Required
Reckoning costs 7 ultimate points. When activated, you release a powerful surge of water that travels forward in a wide area, applying nearsight and slow to enemies it touches.
You can also reactivate the ultimate mid-cast to stop the surge in place. When halted, it lingers for several seconds and continues applying its effects within the zone.
Ultimate properties:
- Cost: 7 ultimate points
- Direction: Forward-moving surge
- Effects: Nearsight + slow
- Reactivation: Stops and holds the area in place
Use Reckoning to open a site. Cast it down main entrances so it pushes defenders off common angles. As it advances, it pressures anyone holding forward positions and weakens their vision.
The reactivation feature gives you control over tempo. Send the surge deep into site, then stop it to lock defenders inside a disorienting field. This creates a sustained entry window rather than a brief disruption.
Combine Reckoning with Storm Surge to stack crowd control. Enemies affected by both struggle to reposition or trade effectively. Add Cove to secure plant space while defenders recover from the layered utility.
Reckoning works best when your team commits behind it. Activate it, push with your duelists, and capitalize on the reduced visibility and mobility of defenders before they reset.
Harbor Guide: How to Play Habor
Play Harbor as a supporting controller in a double-controller lineup. Pair him with Omen or Astra so they handle dependable smoke coverage while you focus on space control and disruption.
On attack, lead with Reckoning or Cascade to force defenders off common angles. Follow with High Tide to cut the site from the side, not straight through your team’s path, since the wave slows allies. Place Cove on the default plant spot to block bullets and secure the spike.
- Use Cascade to clear tight corners before entry.
- Bend High Tide to isolate back site from heaven or CT.
- Drop Cove only when your team commits.
On defense, hold Cascade as your first response to a fast push. Send it through chokepoints to stall momentum, then shape High Tide to divide the execute and limit trades.
If you run Harbor solo, build a composition that compensates for less consistent smoke uptime. Coordinate closely to avoid slowing your own teammates during retakes or rushes.
Best Maps for Harbor
You gain the most value from Harbor when you pair him with a second controller who handles consistent smoke coverage. His kit excels at cutting large areas in half and forcing defenders off angles rather than anchoring sites alone.
Strong picks in the current pool (Ascent, Breeze, Fracture, Haven, Lotus, Pearl, Split):
| Map | Why It Works |
|---|---|
| Pearl | You can sweep High Tide across B Long to isolate defenders and create safer entries. His ultimate and Cascade pressure tight site positions during B hits and retakes. |
| Breeze | The map’s wide lanes reward long wall coverage. High Tide stretches across open ground where standard dome smokes fall short, especially when paired with Viper. |
| Bind | Narrow choke points amplify the impact of Reckoning and Cascade. With another controller covering default smokes, you can focus on disruption and space control. |
You should avoid running Harbor as a solo controller on Split and Fracture. These maps demand consistent, flexible smoke uptime, which agents like Omen or Brimstone provide more reliably.
Pick Harbor when the map favors long sightlines or layered executes, not when your team needs traditional solo smoke coverage.
Playing Effectively Alongside Harbor
You must treat Harbor as a flexible space‑maker, not a standard smoke agent. Cove shields one area at a time, and High Tide forms a moving wall, not a fixed orb.
Call your entry path before the round starts so he can curve High Tide in the correct direction. Clear communication prevents wasted utility and awkward angles.
When Harbor uses Reckoning, move in immediately behind the pulses. The nearsight and slow create a short entry window, and delaying your push removes the pressure it creates.
Tell him exactly when you plan to hit the site so the ultimate lands just before you cross the choke point.
Remember that High Tide slows teammates as well. If you need to run through the wall instead of around it, warn him early so he can lower it with alternate fire and keep your tempo intact.
Best Agent Synergies for Harbor
Run Harbor in a double-controller setup to stabilize your executes. Pair him with Omen, Brimstone, or Astra so you gain reliable dome smokes while Harbor handles large-scale zoning and space control.
Add Breach or Skye to chain crowd control. Their flashes and stuns push enemies trapped by your Cove, Cascade, or ultimate, making site hits cleaner and more coordinated.
Pick fast duelists such as Jett, Raze, or Neon. They capitalize on the disruption window your ultimate creates and convert space into quick entries and plant control.
Countering Harbor Effectively
You can punish Harbor by reacting to the clear cues in his utility. When you hear the cast and impact sound of Storm Surge, move out of its radius before it triggers to avoid the nearsight effect and keep your vision advantage.
Track the path of High Tide before you commit to a push. Harbor can end the wall early, so do not assume it will extend its full distance. Wait a moment, confirm its final shape, and then choose a safer crossing or reposition.
Respect the direction of Reckoning. The ability travels in a straight line, so if you know where Harbor stands, shift sideways instead of backing straight up. Lateral movement breaks the angle and reduces exposure to follow-up pressure.
If Harbor deploys Cove in a choke point, treat it as a temporary barrier. The shield can be destroyed, so coordinate focused fire to remove it and reopen the sightline quickly.
Best Harbor Players
You can study several pros to understand how Harbor works at a high level.
- Mazino – You will notice his precise High Tide placements and well-timed Reckoning executions in North American VCT matches. He often shapes rounds by splitting sites with layered walls and forcing defenders into unfavorable fights.
- s0m – You can watch how he fits Harbor into double-controller comps, using flexible utility to support fast pivots and mid-round calls.
- Boaster – You see him prioritize Harbor on Breeze, where his leadership and site-splitting walls create structured, coordinated executes.