
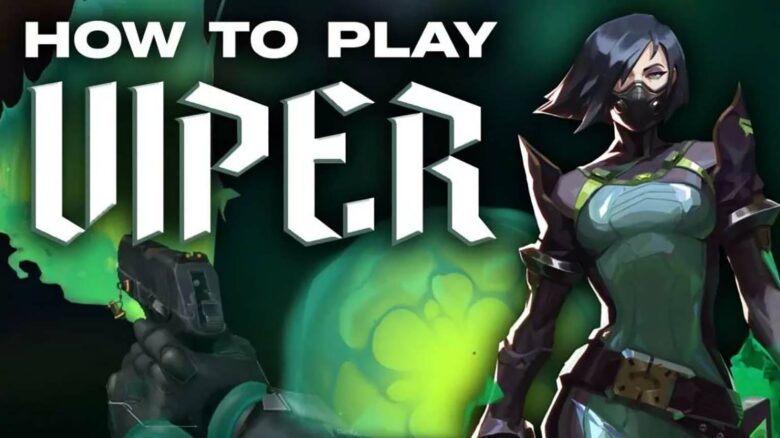
You control space with Viper by cutting off vision and draining enemy health through toxic walls and gas clouds. Her kit allows you to block key sightlines, slow pushes, and force opponents to take unfavorable fights. When you plan your setups carefully, you can shut down large areas of the map with precision.
Viper rewards preparation and strong map knowledge. If you learn her lineups and manage your fuel effectively, you gain exceptional control in post-plant situations and on defense. You turn every site into a controlled zone where enemies must play on your terms.
Viper Abilities: What Does Viper Do?
You control space with poison, vision denial, and timed utility. Your kit revolves around a fuel meter that powers two core abilities, forcing you to decide when to block sightlines and when to conserve resources.
Every gas-based tool applies Decay. Enemies who enter your toxins immediately lose 30 HP from their maximum health, then continue losing 10 HP per second while they remain inside. This makes even armored opponents easier to eliminate and punishes anyone who tries to push through your utility.
Fuel drains while your wall or orb remains active and refills when you turn them off. If you run both at the same time, fuel depletes faster, so you must alternate usage to maintain control throughout the round.
Snake Bite (C) – 300 Credits, Single Use Per Round
Type: Damage-over-time projectile
Effect: Real damage + Vulnerable debuff
Cost: 300 credits
You fire a chemical canister that bounces off surfaces before breaking open into a corrosive pool. Unlike your gas abilities, this ability deals direct damage, not Decay.
Anyone caught inside takes damage over time and becomes Vulnerable, which doubles incoming damage for two seconds after leaving the area. That window lets you secure fast eliminations if enemies attempt to escape.
Primary uses:
- Post-plant denial: Fire it onto the spike to punish defuse attempts.
- Chokepoint control: Block narrow entrances during defensive holds.
- Corner clearing: Force opponents out of tight angles before entry.
The bounce mechanic allows creative lineups around walls and cover. With practice, you can deploy it from safe positions and still threaten critical objectives across the site.
Poison Cloud (Q) – 200 Credits, Toggleable Orb That Lasts All Round
Type: Deployable smoke
Effect: Applies Decay
Cost: 200 credits
You throw a gas emitter that remains on the map for the entire round. Once placed, you cannot move it, but you can toggle it on and off at will, consuming fuel while active.
When activated, it forms a spherical smoke that blocks vision and applies Decay to enemies inside. Because it persists all round, one purchase gives you repeat value instead of a single-use smoke.
Key traits:
- Can be retrieved and repositioned during the buy phase
- Applies Decay instantly on contact
- Drains fuel while active
- Combines with your wall for layered control
On defense, you typically place it at a main entrance to stall pushes. On attack, you can anchor it near the spike and activate it only when enemies attempt to retake.
If you activate both this orb and your wall simultaneously, your fuel drains faster. You should stagger activation to avoid running empty during critical moments.
Toxic Screen (E) – Free Signature Wall, Toggleable and Round-Long
Type: Linear vision barrier
Effect: Applies Decay
Cost: Free (signature ability)
You deploy a long line of gas emitters that create a vertical wall of poison when activated. The wall stretches across terrain and can cut through large portions of a site or lane.
Like your orb, this ability consumes fuel while active and can be toggled off to recharge. Once placed, you cannot reposition it during the round, so you must decide its placement before engagement begins.
Important mechanics:
| Feature | Details |
|---|---|
| Placement | Fixed after deployment |
| Duration | Controlled by fuel |
| Effect on enemies | Applies Decay |
| On death | Remains active for 2 seconds |
The wall allows you to split bombsites, block Operator sightlines, or isolate defenders into smaller segments. On larger maps, it becomes your primary way to take space because it covers more distance than standard smokes.
If you fall while the wall is active, it lingers briefly before collapsing. That short delay can still protect teammates during trades.
Viper’s Pit (X) – Ultimate Ability, 7 Points Required
Type: Large-area control ultimate
Effect: Extreme Decay + near vision restriction
Cost: 7 ultimate points
You release a massive toxic cloud centered on your position. The cloud persists indefinitely as long as you remain inside or return within 15 seconds after stepping out.
Enemies inside suffer severe Decay, dropping as low as 1 HP over time. Their vision range becomes heavily limited, and you see them outlined clearly through the fog.
Inside the pit:
- Enemies lose maximum health continuously
- Opponents become nearsighted
- You gain a visibility advantage
- Fuel is not consumed
You can briefly exit to take a duel and re-enter within the 15-second grace period without losing the ultimate. That flexibility allows aggressive repositioning during chaotic fights.
The ultimate transforms a planted site into a confined engagement where you dictate pace and positioning. When paired with well-timed Snake Bite usage on the spike, you can significantly delay or punish defuse attempts while maintaining visual control inside the cloud.
Viper Guide: How to Play Viper
You gain the most value from Viper when you plan before the barrier drops. Decide your Poison Cloud placement and choose a Toxic Screen line that supports your team’s pathing and timing.
On attack, use Toxic Screen to cut a bomb site into safer sections or to support a slow lurk. Drop Poison Cloud to block a key sightline or protect an entry point. Hold Snake Bite for post-plant control or to stop defenders from pushing through tight choke points.
On defense, react to sound and map pressure. Activate your utility when you detect a commit, then turn it off if the push fades to conserve fuel.
Fuel management defines your impact. Avoid running Poison Cloud and Toxic Screen together for long periods.
| Ability Combo | Risk | Best Practice |
|---|---|---|
| Wall + Orb active | Rapid fuel drain | Toggle in short bursts |
| Single ability active | Slower drain | Cycle based on pressure |
Where You Should Pick Viper
You get the most value from Viper on maps with long sightlines and open lanes. Her Toxic Screen covers large areas, blocks vision across wide choke points, and strengthens post-plant setups where delaying defuses matters most.
Top choices in the current pool (Ascent, Breeze, Fracture, Haven, Lotus, Pearl, Split):
- Breeze – You should treat Viper as a primary controller here. Her wall slices through Mid and B Long, reducing exposure on wide angles and enabling safer site takes.
- Pearl – You can use her wall on B to pressure long control and force defenders into predictable positions. This map consistently rewards strong wall placement and post-plant lineups.
- Fracture – You can divide the map’s H-shaped layout with one well-placed screen, cutting rotations through central areas and supporting split pushes.
- Split – You gain strong Mid denial and A-site pressure, especially when running a double-controller setup.
More situational pick:
- Haven – You can make Viper work, but three sites stretch your utility. Pair her with another controller to maintain full coverage.
How to Coordinate With Viper on Your Side
Play around timing and clear communication. Viper does not drop instant smokes, so you need to call for utility early and specify exact choke points or angles you want covered.
On site hits, give her space to deploy Toxic Screen before you push. Let the wall go up first, then scale with it so your duelists cross safely and take close fights inside the cover.
After the spike goes down, shift your focus to protecting her. Viper’s Pit can lock down a site by itself, but only if she stays alive and activates it at the right moment.
- Hold flank routes.
- Trade for her inside the pit.
- Feed her information constantly.
Best Teammates to Pair with Viper
You gain the most value from Viper when you run a double-controller setup. Pair her with Omen or Brimstone so you can divide responsibilities: you cut long sightlines with Toxic Screen while they place focused smokes for entries, retakes, or map control. This layered utility makes site hits and holds more structured.
You also benefit from pairing with strong post-plant agents.
- Killjoy – Nanoswarms stacked inside Viper’s Pit punish defuse attempts.
- Other molly agents – Damage over time becomes more lethal against decayed enemies.
For entry power, play alongside fast duelists:
- Jett
- Raze
- Neon
They push through your wall safely and create space while enemies struggle to see through your screen.
Countering Viper Effectively
You can exploit Viper’s biggest limitation: fuel management. Her wall and orb consume a shared resource, and both shut off when it runs dry. Force early utility by faking pressure or starting a fast hit, then pause or re‑engage once her screen drops mid-execute.
Watch and listen for Toxic Screen as it rises. It takes a moment to fully deploy, so push decisively during that setup to reduce time spent under Decay. When she turns off Poison Cloud, react immediately; the orb has a short shutdown animation that creates a clear timing window to take space.
Against Viper’s Pit, never enter alone. Move in as a group and layer flashes or crowd control to displace her.
- Use stuns or knock-ups to interrupt her spray control.
- Send scouting tools first to confirm her position.
- Trade quickly if she swings through the fog.
Discipline and timing deny her long post-plant control.
Top Viper Specialists to Study
If you want to refine your Viper play, study Less. You can learn disciplined fuel control, efficient Toxic Screen timing, and precise Snake Bite lineups that secure post-plant rounds on the international stage.
You should also watch nAts, especially for structured setups.
- Smart wall placement for map control
- Patient post-plant positioning
- High-impact lurks with utility discipline
Both players show how you can turn Viper into a consistent round-winning controller.