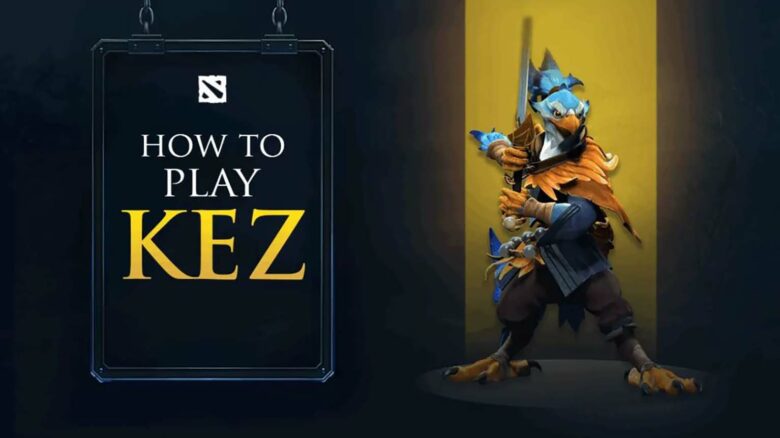
Kez stands among the newest additions to Dota 2, and you will quickly notice that he demands precision and practice. His design introduces a dual-ability system that challenges you to manage two distinct sets of skills within a single hero.
If you want to play Kez effectively, you must understand how his mechanics shape every decision in fights and during farming. Mastery comes from learning when to shift your approach and how to use each toolkit with purpose.
What Defines Kez in Dota 2?
Kez stands out as one of the most mechanically demanding heroes you can pick. You control two distinct weapon stances—Kazurai Katana and Shodo Sai—and each stance grants a completely different set of abilities.
When you swap weapons, your entire ability layout changes to match the active stance. You effectively manage two separate kits within a single hero slot.
However, both stances draw from the same cooldown system. If you cast an ability in one stance and then switch, the corresponding ability in the other stance remains unavailable until the cooldown ends.
This shared limitation forces you to plan ability order carefully.
To play Kez well, you must:
- Understand the strengths of each stance
- Time your stance swaps with precision
- Chain abilities efficiently across both forms
You rely on execution and decision-making rather than simple spell usage.
Which Position Does Kez Typically Play?
You primarily run Kez as a carry. He scales strongly with farm and converts items into high physical damage output.
Some players experiment with him in the mid lane, but you rarely see him succeed in support or utility roles.
You focus on securing resources, accelerating item progression, and using your dual-stance toolkit to eliminate targets in fights.
How to ACTUALLY Use Kez’s Abilities
Kez forces you to think in two modes at all times. You don’t just press spells—you choose the right stance for the moment and commit to it.
Below, you’ll find how to use each stance properly in real matches.
Mastering the Kazurai Katana Toolkit
When you hold the sword, you play as a sustained damage core with strong AoE pressure. This stance rewards clean positioning and controlled aggression.
Echo Slash (Q) – Use It for More Than Wave Clear
Echo Slash sends out an area attack, slows enemies, and slightly repositions you forward. It also applies your attack modifiers to every unit hit.
That interaction matters. If you build items like Desolator, every target in the radius receives the armor reduction. You can quickly soften an entire team before a full engagement.
Use Echo Slash in three main ways:
- Teamfight opener to apply modifiers to multiple heroes
- Wave shove tool to clear quickly and rotate
- Micro-mobility tool to cross cliffs and cut trees
The short leap lets you move between high and low ground. You can also remove trees to reveal hidden heroes or disrupt tree-based mechanics. Treat it as controlled repositioning, not a blind dive.
Grappling Claw (W) – Controlled Engagement and Escape
Grappling Claw pulls you toward a target and applies a slow when you arrive, along with a follow-up hit.
You use this to start fights on backline heroes. Supports with limited mobility become easy targets once you connect.
The ability also targets creeps and trees, which makes it a flexible escape option. You can:
- Grapple to neutral camps while retreating
- Swing to trees to change direction
- Hover over terrain to create space
Avoid using it recklessly. Once you commit, you put yourself in the center of danger. Make sure you know where enemy disables are before you swing in.
Kazurai Katana (E) – Stack First, Detonate Smart
This ability builds damage-over-time stacks through attacks and abilities. You can then activate it to release stored damage instantly.
Think of it as pressure that turns into burst.
The passive stacking rewards extended trades. When you stick to a target with slows or control from teammates, the damage ramps up quickly. The active detonation gives you a spike to finish someone before they escape.
Keep in mind:
- The burst cap is limited
- The cooldown is short
- The mana cost is low
That means you don’t need to overthink the timing. Once you’ve built reasonable stacks, activate it. Waiting too long often wastes potential damage during fights.
Raptor Dance (R) – Channel Discipline Wins Fights
Raptor Dance requires a short channel. If you complete it, you unleash multiple pure-damage slashes around you and gain full lifesteal from the hits.
Pure damage ignores both armor and magic resistance. This makes the ultimate especially strong against tanky cores.
However, interruption cancels the full value. Stuns and silences ruin your impact. You must:
- Track enemy disables before committing
- Consider Black King Bar in heavy control games
- Avoid channeling at the edge of vision without protection
When you execute it correctly in the middle of several heroes, you can restore massive health instantly. If you enter low and hit multiple targets, the lifesteal can swing the fight in your favor.
Position carefully. Channel confidently. Commit only when you know you won’t be stopped.
Optimizing the Shodo Sai Arsenal
When you switch to dual daggers, you trade raw AoE pressure for control, burst setups, and tactical mobility. This stance focuses on isolating targets and punishing mistakes.
Falcon Rush (Q) – Pressure and Target Flexibility
Falcon Rush accelerates you toward a target and creates echo attacks that deal additional hits.
This ability helps you stick to heroes and build stacks quickly. The extra hits increase your damage output during short windows.
Use it to:
- Close distance on mobile heroes
- Rapidly build passive stacks
- Switch targets mid-duration if a better opportunity appears
You can also cast it on creeps. That small detail gives you an escape route when chasing becomes unsafe. Dash to a nearby unit, reposition, then disengage.
Avoid tunneling. If your initial target becomes unreachable, shift immediately.
Talon Toss (W) – Silence Before They React
Talon Toss throws a dagger that explodes on impact, dealing damage and silencing enemies in an area.
The projectile travels before applying the silence. Distance matters. If you cast from far away, mobile heroes may dodge or activate defensive spells.
Cast it from closer range when possible. That reduces reaction time.
This spell shines against:
- Puck
- Ember Spirit
- Slark
- Other ability-reliant cores
In lane, you can also use it to secure ranged creeps safely. But its real value appears in skirmishes where silence prevents escapes.
Shodo Sai (E) – Random Threat, Skill-Based Counterplay
This ability works in two layers.
Passive: Your attacks and abilities have a chance to apply a Mark. Marked hits can stun, deal critical damage, and ignore evasion through True Strike.
The chance is not high, but the payoff is significant. When it triggers, trades heavily favor you.
Active: You enter a directional parry stance. During this time, you cannot attack. If you successfully block from the chosen direction, you stun and Mark the attacker.
You use the active portion against predictable aggression. Aim it toward:
- A right-click carry focusing you
- A projectile-based attack
- A hero who must face you to deal damage
Good timing turns defense into initiation. Poor timing leaves you disarmed and exposed.
Practice reading attack animations. The better your timing, the more value you extract.
Raven’s Veil (R) – Reset, Isolate, Execute
Raven’s Veil sends out a large wave, applies Mark to enemies hit, grants invisibility, dispels you, and increases movement speed.
Unlike the sword ultimate, this one does not deal immediate heavy damage. It sets up kills.
When you activate it:
- Enemies inside the radius become Marked
- Your next hit stuns and deals bonus damage
- You gain mobility and invisibility
- You remove certain negative effects from yourself
You can use it in two ways.
Offensively:
Activate it in the middle of a fight, reposition while invisible, then strike a priority target with a guaranteed empowered hit.
Defensively:
Use the dispel and invisibility to disengage when focused.
Enemies caught in the wave also suffer reduced vision. That temporary blindness limits their awareness and helps you isolate a single hero.
Move quickly during the invisibility window. Choose a vulnerable target and commit before the Mark expires.
Switching With Purpose
You don’t swap stances randomly. You switch based on intent.
| Situation | Better Stance |
|---|---|
| Farming waves quickly | Katana |
| Starting a large teamfight | Katana |
| Chasing slippery heroes | Sai |
| Locking down mobile cores | Sai |
| Bursting one isolated target | Sai |
| Sustained AoE damage | Katana |
Katana favors sustained pressure and lifesteal scaling. Sai favors control, precision, and short engagements.
You win with Kez when you identify the fight type before it starts. Choose the stance that fits the moment, execute cleanly, and switch only when the situation demands it.
Kez Aghnaim’s Upgrades
Aghanim’s Shard
This upgrade only affects your Katana stance, leaving the Sai form unchanged. When you land the impale attack in Katana stance, you gain 100% lifesteal from the damage dealt.
If you strike an enemy from behind with that impale, you also apply a stun, giving you brief control during skirmishes.
- Works only in Katana stance
- Grants full lifesteal on impale
- Adds a stun when hitting from behind
The effect is situational. You must position carefully to trigger the stun, and the benefit does not enhance your stance-switching flexibility. Many players delay or skip this pickup unless they need the sustain.
Aghanim’s Scepter
This upgrade improves Switch Discipline, your stance-swapping ability.
Normally, using a weapon skill places its paired ability on cooldown. With Scepter, the first ability you cast within 3 seconds of switching stances does not trigger that shared cooldown.
| Without Scepter | With Scepter |
|---|---|
| Alternate skill goes on cooldown | First paired skill stays available |
| Limited combo flow | Two-stance combo potential |
You can chain abilities from different stances back-to-back. That freedom increases your damage output or mobility depending on the combination you choose.
Kez Ability Build
Select the Flutter facet in almost every match. It delivers consistent value, while the alternative currently offers no practical benefit.
Prioritize Q first, focusing on the Katana stance for early impact. Echo Slash helps you secure ranged creeps, pressure opponents, and clear jungle camps efficiently. The low cooldown and strong base damage give you reliable lane control.
Follow this standard progression:
| Level | Skill / Talent |
|---|---|
| 1 | Q |
| 2 | E |
| 3 | W |
| 4 | Q |
| 5 | Q |
| 6 | R |
| 7 | Q (Max) |
| 8–9 | E |
| 10 | +12% Magic Resistance |
| 11 | E (Max) |
| 12 | R |
| 13–14 | W |
| 15 | +2 Falcon Rush Duration |
| 16 | W (Max) |
| 18 | R |
| 20 | +4% Kazurai Katana DPS |
After maxing Q, invest in E for mobility and survivability, then finish W.
Choose talents that enhance durability at level 10, extend Falcon Rush at 15, and increase Katana damage over time at 20 to strengthen your sustained fights.
Kez Item Build
Early Game Purchases
You open most games with a small set of reliable lane items that secure sustain and steady scaling.
- Magic Wand – Gives burst health and mana in trades. It keeps you active in lane and lets you cast one more spell during close skirmishes.
- Falcon Blade – Adds damage, health, and much-needed mana regeneration. It supports frequent ability use while improving your last-hitting.
- Power Treads – Your standard boots choice. The attack speed increases your damage output, and attribute switching helps you manage mana and survivability efficiently.
These items stabilize your lane and prepare you for either a farming-focused or combat-focused transition.
Main Power Spikes
You choose between two distinct paths depending on tempo and matchup.
Farming-Oriented Path
If you want to scale into the late game, prioritize steady gold acceleration and strong stats.
- Battle Fury – Speeds up your farm through cleave damage. You sacrifice early fight presence but gain long-term item progression.
- Manta Style – Provides agility, movement speed, and a basic dispel. Use it to remove slows or silences and to increase your damage output in extended fights.
- Black King Bar – Ensures you can activate abilities and commit during engagements without interruption.
This route suits games where you expect space to farm and need to outscale the enemy carry.
Mid-Game Damage Path
If your lineup wants to pressure early, shift toward immediate physical damage.
- Desolator – Reduces armor and significantly boosts your burst potential around the 15–20 minute mark.
- Black King Bar – Pick it up earlier in this build since you will fight more frequently.
- Daedalus – Increases your critical damage and amplifies the impact of armor reduction.
This approach allows you to contest objectives and win skirmishes sooner.
Late-Game Extensions
After core items, adjust based on enemy tools and fight dynamics.
| Item | Purpose |
|---|---|
| Aghanim’s Scepter | Expands your ability usage and increases flexibility in fights. |
| Nullifier | Prevents enemies from escaping or protecting themselves with defensive items. |
| Satanic | Grants lifesteal and a strong dispel for direct engagements. |
| Monkey King Bar | Counters evasion and improves consistent damage. |
| Butterfly | Adds agility, attack speed, and evasion for survivability in long fights. |
Choose these upgrades according to the threats you face and the role you must fulfill in each match.