
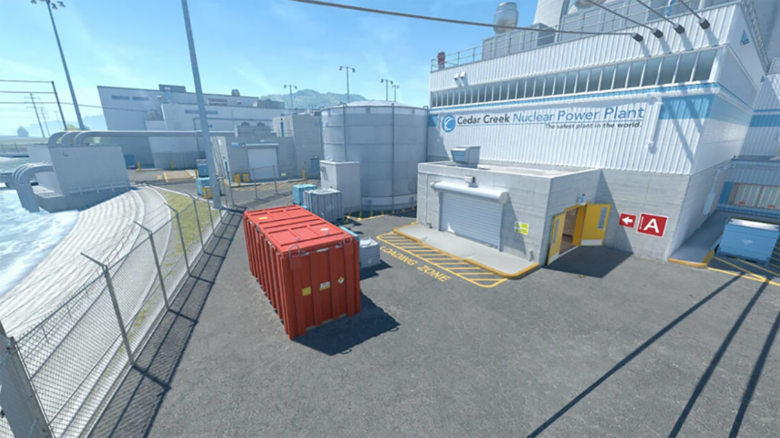
You play on one of Counter-Strike’s most recognizable maps when you load into Nuke. The map has stayed relevant since the early days of the series, even as it rotated in and out of competitive pools and received major redesigns over time.
Because the layout evolved across versions, the way you name and communicate positions has also changed. Today’s CS2 version has stable, widely accepted callouts, and you need to know them well if you want to coordinate effectively and keep up with experienced players.
CS2 Nuke Callout Reference
You deal with Nuke across multiple vertical layers, so you need precise language to keep timing and rotations clean. Callouts on this map focus on elevation, tight corridors, and fast transitions between sites. Clear naming helps you track pressure between A, Outside, Ramp, and B without hesitation.
You will hear many of these terms in rapid sequences, especially during splits or retakes. Treat each callout as a location plus an implied angle or threat, not just a name.
Complete Nuke Location Callout Directory (2026)
The list below organizes commonly used Nuke callouts so you can react faster and visualize enemy positions more accurately. You should expect teams to shorten many of these names in live communication.
Core Spawns and Exterior Areas
| Callout | What You’re Referring To |
|---|---|
| CT Spawn | Your starting area on the Counter-Terrorist side |
| T Spawn | The Terrorist starting point |
| Truck | The large vehicle near T Spawn |
| Outside | The open yard between spawns and the main building |
| Red | The red container in Outside |
| Blue Box | The blue container along the building exterior |
| Garage | The CT-side structure overlooking Yard Boxes |
| Yard Boxes | The stacked crates beneath Silo |
| Silo | The tall cylindrical structure reachable from T Roof |
| Secret | The stairwell leading down toward B |
| Tunnels | The underground corridors from Secret |
| Back Vents | The passage connecting Secret or Vents to Single |
These areas define rotations and map control early in the round. When you hear Outside pressure, expect fast splits toward Secret or Main.
Lobby and Upper A Access
| Callout | What You’re Referring To |
|---|---|
| Lobby | The main interior space on the Terrorist side |
| T Roof | The rooftop above Lobby |
| Squeaky | The small room with the loud door into A |
| Radio | The connector from Lobby toward Ramp |
| Trophy | The small room between Radio and Control |
| Control | The corridor leading into Ramp |
| Boost | The box stack near Control for elevation |
| Ninja | The cubby beneath Boost |
You usually hear these callouts during slow defaults or late executes. Control and Trophy often signal a Ramp commitment.
Ramp and Lower Transitions
| Callout | What You’re Referring To |
|---|---|
| Ramp | The sloped area connecting upper and lower levels |
| Big Box | The large box at the top of Ramp |
| Headshot | The back box on Ramp with tight angles |
| Bottom Ramp | The lower portion leading toward B |
| Hell | The room beneath Heaven |
| Lockers | The windowed room next to Hell |
| CT Box | The small box outside CT Spawn |
Ramp callouts often come in pairs because of vertical spacing. You should always clarify top or bottom when calling Ramp pressure.
A Site Interior Positions
| Callout | What You’re Referring To |
|---|---|
| A Site | The upper bomb plant zone |
| Hut | The small structure connecting Lobby to A |
| Tetris | The stacked boxes beside Hut |
| Heaven | The tucked upper platform above Hell |
| Rafters (A) | The beams surrounding the upper A perimeter |
| Vent | The breakable vent near Squeaky |
| 2nd Vent | The non-breakable vent further from Squeaky |
| Main | The exit between vents leading Outside |
When you attack A, these callouts help isolate defenders playing above or tucked behind cover. Rafters and Heaven often require utility before entry.
B Site and Underground Areas
| Callout | What You’re Referring To |
|---|---|
| B Site | The lower bomb plant zone |
| Single | The small room with one door into B |
| Double | The double-door entrance to B |
| Window | The double window overlooking B |
| Dark | The hidden cubby inside B |
| Rafters (B) | The beams above the B Site floor |
| Vents | The interior of the vent system |
B Site callouts rely heavily on elevation and line-of-sight. When you hear Window or Rafters, expect vertical pressure rather than floor-level fights.
You should stay alert for future map updates that adjust layouts or sightlines. If Valve changes geometry, teams often adapt callout usage to match new angles and movement paths.