Inferno has evolved through many versions, yet it remains a core part of Counter-Strike because its layout rewards coordination, timing, and utility use. You still play it at the highest level, which makes familiarity with the map essential rather than optional.
If you queue Inferno in CS2, you need clear and consistent callouts to communicate quickly with your team. Learning these names helps you react faster, rotate with purpose, and avoid confusion during key moments.
Inferno CS2 Callouts Guide
You play Inferno often in CS2, especially in lower and mid ranks. Many teammates already rely on standard callouts, so using the same language keeps rounds organized. Even partial knowledge improves rotations, trading, and utility timing.
You do not need every name memorized to be effective. You need the calls that describe where fights happen and where threats move next. This section focuses on clear, commonly accepted labels you hear in Premier and FACEIT matches.
Updated Inferno Callout Directory for CS2 (2026)
The table below groups callouts by map control zones. Each entry explains what you see or how players use the position during live rounds.
Spawns and Core Rotation Paths
| Callout | What You Mean in Practice |
|---|---|
| T Spawn | Your starting area as Terrorist each round. |
| CT Spawn | Counter-Terrorist starting zone and main rotation hub. |
| Truck | Green truck beside CT Spawn used for cover. |
| Speedway | Covered lane straight out of CT Spawn toward B. |
| Arch | Stone archway linking CT Spawn and Long. |
| Library | Small room connecting CT Spawn to A Site. |
These locations anchor rotations. When you call pressure here, teammates adjust site coverage faster.
Banana and B-Site Control
| Callout | What You Mean in Practice |
|---|---|
| Banana | Long corridor leading from T side toward B. |
| Ramp | Small incline from T Spawn into Banana. |
| Logs | Tight cubby halfway up Banana. |
| Sandbags | Defensive bags near CT-side Banana choke. |
| Car | Barrels near top Banana, named after the old car. |
| CT | Open area between CT Spawn and B Site. |
| Boost | Raised ledge CTs reach with teammate assistance. |
Banana calls matter because fights stack quickly here. Clear wording helps with utility coordination and trade spacing.
B Site Interior Positions
| Callout | What You Mean in Practice |
|---|---|
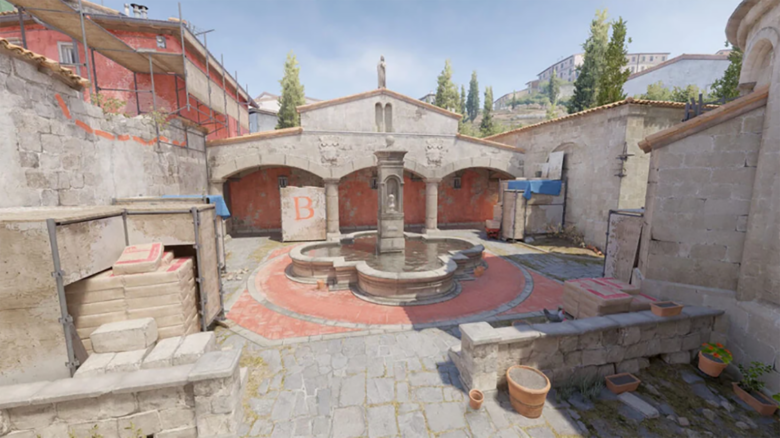
| B Site | Bomb plant zone on the B side. |
| Fountain | Large centerpiece structure in B. |
| Coffins | Tall cover facing Banana, formerly actual coffins. |
| Quad | Large scaffold at the back of site. |
| Dark | Hidden corner cubby on site. |
| First | Gap between first and second scaffold on left side. |
| Second | Space beside the second scaffold on left side. |
| Church | Building entrance leading into B. |
| Garden | Open area just outside Church. |
When you hold or retake B, these calls prevent confusion during post-plant setups.
Mid and Connector Areas
| Callout | What You Mean in Practice |
|---|---|
| Mid | Central open lane of the map. |
| Second Mid | Parallel open lane beside Mid. |
| Underpass | Tunnel linking Mid and Second Mid. |
| Bridge | Overpass above Second Mid into Window. |
| Window | Room overlooking Second Mid. |
| Back Alley | T-side path toward Apartments. |
Mid information controls rotations. Calling exact positions avoids over-rotating or leaving gaps.
Apartments and Short Side
| Callout | What You Mean in Practice |
|---|---|
| Apps | Enclosed hallway toward A from T side. |
| Living Room | Room up the stairs near T Spawn before Ramp. |
| Balcony | Ledge outside Apps overlooking A approach. |
| Boiler | Base of stairs from Apps onto Short. |
| Patio | Covered corner on Short with boost potential. |
| Short | Primary A approach from Apartments. |
Short-side calls often decide A holds. Precision matters because angles stack tightly.
A Site and Defensive Anchors
| Callout | What You Mean in Practice |
|---|---|
| A Site | Bomb plant zone on A. |
| Pit | Dug-out corner extending below Balcony. |
| Graveyard | Elevated back corner of A Site. |
| Long | Wide approach from CT Spawn into A. |
You use these calls most during executes and retakes. Short, direct phrasing keeps comms clean.
These callouts stay consistent across updates. Even when visuals change, players keep the same names. When you use these terms clearly and early, your team reacts faster and holds space with less hesitation.