Mirage stands as one of the most established maps in Counter-Strike 2, with a continuous presence in competitive play since its introduction in 2014. Its long history has shaped a shared understanding of how players communicate positions and movements.
You benefit from learning Mirage callouts because most players already rely on them during matches. When you use the same language as your teammates, you improve coordination and reduce confusion in fast-paced situations.
Mirage Callouts for CS2
You rely on precise callouts on Mirage because the map rewards timing and positioning. You already recognize most names, but you need to pair each call with the correct visual reference. When you speak clearly and accurately, you help your team react faster and avoid costly misunderstandings.
You should think of Mirage as three connected zones: A Site, Mid, and B Site. Each zone contains landmarks that anchor communication. The names rarely change, so consistency matters more than creativity when you call positions.
Complete Mirage Location Calls (2026)
The list below organizes Mirage callouts by map control areas. Use these names exactly as you see them in play so your teammates know where to aim, rotate, or hold.
Spawn and Rotation Areas
| Callout | What You See | Why It Matters |
|---|---|---|
| T Spawn | Terrorist starting area | Sets defaults and late-round fallbacks |
| CT Spawn | Counter-Terrorist starting area | Key for retakes and rotations |
| CT | Ramp leading from A toward T Spawn | Common AWP and rifle angle |
| Ticket | Booth on the right side of CT | Frequent sniper position |
| Trash | Trash can near CT | Tight cover during A holds |
| Vent | Breakable vent near Window | Fast CT rotation option |
You often reference these spots during retakes or late-round decisions. Accuracy here helps your team judge rotation speed and pressure.
A Site and A Main Control
| Callout | Visual Identifier |
|---|---|
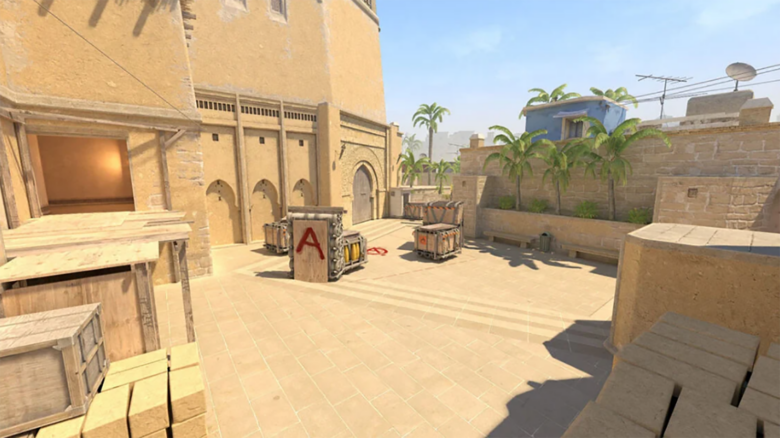
| A Site | Bomb plant zone |
| Triple | Three stacked boxes |
| Default | Boxes near Ramp plant |
| Ninja (A) | Tight cubby beside site |
| Firebox | Back-site boxes |
| Stairs | Steps in front of Connector |
| Sandwich | Gap between Stairs and Tetris |
| Tetris | Block-shaped cover near Ramp |
| Ramp | Main entry from T side |
| T Roof | Elevated platform near Ramp |
| Balcony | Scaffolding outside Palace |
| Palace | Enclosed path into A |
When you defend or execute A, these callouts shape every trade. Calling “Default” or “Triple” instead of “on site” gives your teammates a clear pre-aim target.
Mid Control and Connectors
Mid decides the pace of Mirage, so you need sharp detail when you communicate here.
| Callout | Description |
|---|---|
| Mid | Central lower area |
| Top Mid | Ramp leading into Mid |
| Mid Boxes | Tall boxes at T-side Mid |
| Window | Open window overlooking Mid |
| Connector | Passage linking Mid and A |
| Jungle | Open space near Connector |
| Ladder Room | Room between Window and Short |
| Chair | Cubby with a visible chair |
| Crane | Vertical pillar near Chair |
| Underpass | Tunnel between Mid and B Apps |
If you say “one Chair” or “pushing Connector,” you give exact context. Vague Mid calls usually cause missed trades.
B Apartments and B Site
| Callout | Visual Identifier |
|---|---|
| B Apartments (Apps) | Main hallway to B |
| Balcony | Exit ledge from Apps |
| Van | Van under Balcony |
| Bench | Back-site cover |
| Arches | Stone arches near Short |
| B Site | Bomb plant area |
| Ninja (B) | Boosted hiding box |
| Market | Room connecting CT to B |
| Door | Tight doorway from Market |
| B Window | Window from Market to site |
| Alley | Path near B Stairs |
| Under Stairs | Space beneath stairs |
| Kitchen | Room past Alley |
On B, short and direct calls matter most. Saying “Van and Bench” immediately tells your team where to clear before planting or retaking.
You improve team coordination when you match each callout to what you actually see. Mirage rewards clarity, and these names give you a shared language that keeps rounds structured and controlled.