How to Change Crosshair
In the realm of competitive hero shooters like Marvel Rivals, modifying your crosshair is a crucial skill for enhancing gameplay. New players might initially find the default crosshair sufficient, yet experience soon reveals the advantages of personalization.
A singular approach doesn't suit every player. Crosshair customization is important for aligning with unique playstyles and roles within the game. Thankfully, Marvel Rivals provides a variety of customization options, enabling players to adjust their settings to enhance accuracy and performance.
Customizing Crosshairs in Marvel Rivals
Changing the crosshair settings in Marvel Rivals depends on your platform, whether it's a PC or a console. Here’s how to adjust them:
PC Instructions:
- Start Marvel Rivals: Open the game on your PC.
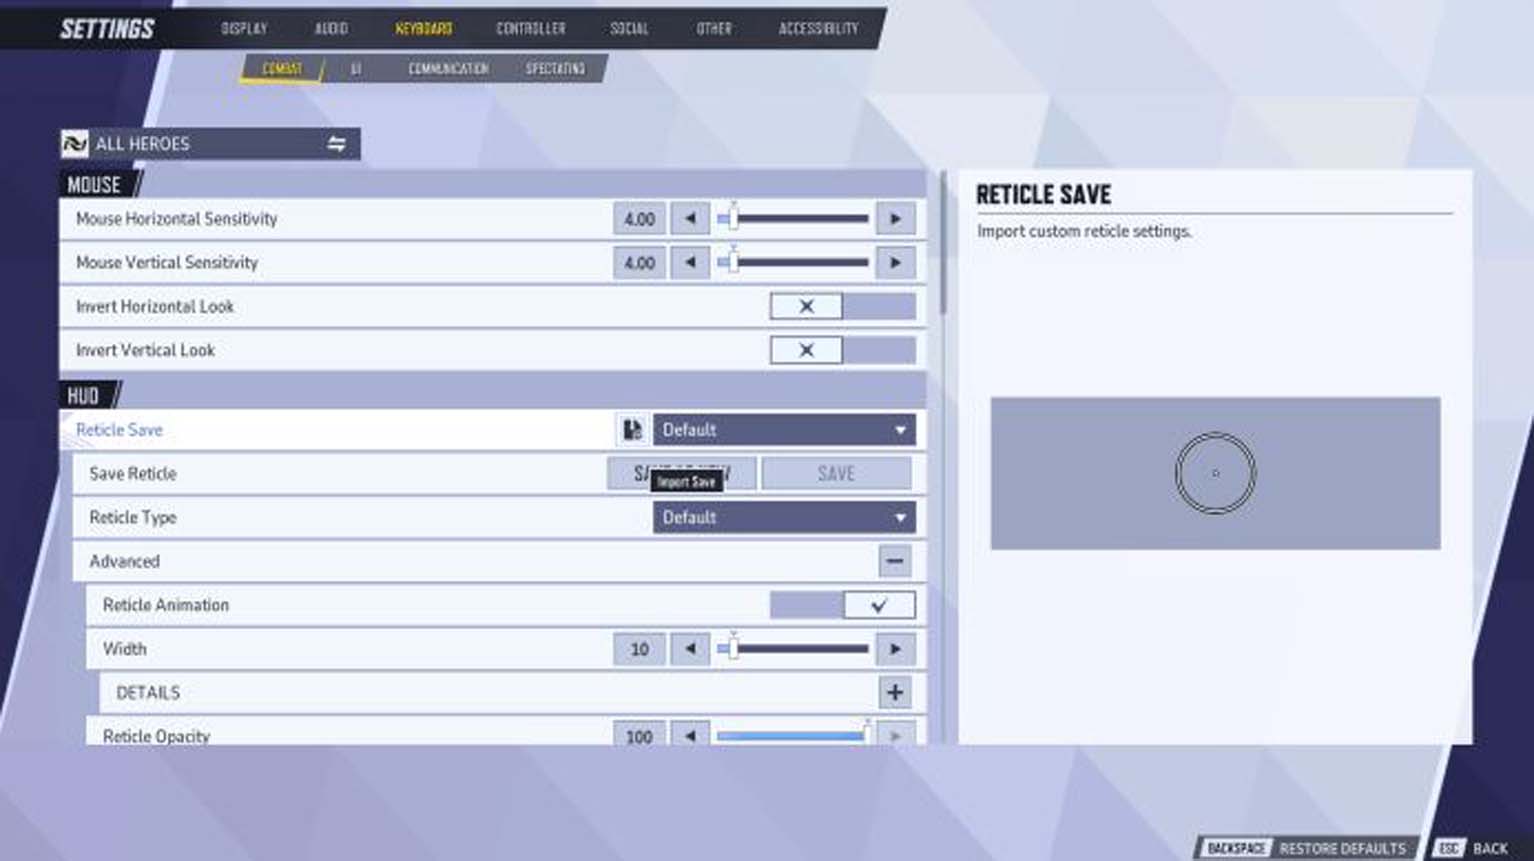
- Access Settings: Navigate to the ‚Settings‘ menu.
- Keyboard Configuration: Go to the ‚Keyboard‘ tab.
- Combat Settings: Locate the ‚Combat‘ settings under this tab.
- Adjust HUD: Scroll to the HUD section where you can modify the Reticle. The ‚Advanced‘ options offer further customization.
After tailoring your crosshair to your preferences, select ‚Save as New‘ and choose a name for it.
Console Instructions:
- Open Settings: Access the ‚Settings‘ menu.
- Switch to Controller: Find the ‚Controller‘ tab.
- Navigate to Combat: Within the ‚Combat‘ tab, scroll until you reach the HUD section.
- Modify Reticle: Make adjustments to your reticle and ensure you save your changes.
Players can maintain up to five custom crosshairs in their profile. If all five slots are occupied, removing an existing crosshair is necessary before adding a new one.