
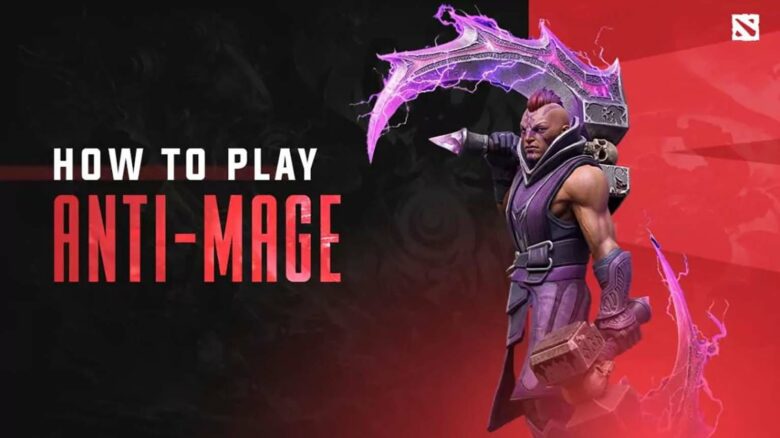
Anti-Mage stands out as one of the most picked carries in Dota 2 because he lets you take control of the game’s pace. When you farm efficiently and choose your fights well, you become the central damage threat your team relies on.
If you want to carry games from the safelane and dictate map pressure, you need to understand his strengths, limits, and timing. This guide helps you approach Anti-Mage with clear priorities so you can make steady, informed decisions throughout each match.
Anti-Mage At a Glance
You play Anti-Mage as a position 1 carry who prioritizes gold above everything else. Your early presence stays limited, and you rely on careful farming patterns to avoid falling behind. Until you secure core items, you contribute little to early fights.
Anti-Mage excels against heroes who depend on large mana pools and frequent spell usage. Your kit punishes mana-heavy opponents and turns their resource reliance into a weakness.
Your biggest challenge is timing. You need multiple items before you can pressure the map consistently. If you farm efficiently and delay enemy momentum, you transition into a durable split-pushing threat and a late-game damage dealer who can dismantle spellcasters in extended fights.
How to REALLY Use Anti-Mage’s Abilities
Mana Burn Strikes (Q)
Your first tool is a passive that drains mana with every attack and converts part of that burned mana into extra physical damage. When you hit an enemy with a large mana pool, you increase both their resource pressure and your damage output at the same time.
You should prioritize heroes who depend on spells to survive or deal damage. Each attack reduces their ability to respond while making your follow-up ultimate more lethal.
Use it with intent:
- Harass mana-dependent offlaners early.
- Pressure mid and supports in skirmishes.
- Accelerate farming against creeps that have mana (ranged creeps and most neutrals).
- Focus high-mana cores in fights to amplify later burst.
This passive also improves your farming speed. Camps with mana-bearing creeps fall faster, which helps you reach key items sooner.
Remember that your damage scales with the target’s current mana. Start fights on heroes who are still full, not empty.
Blink Mobility (W)
Your short-range teleport defines your map presence. It allows you to reposition instantly for aggression, escape, or efficient farming rotations.
In fights, you use it to jump past the frontline and reach fragile spellcasters. In dangerous situations, you use it to dodge incoming pressure before disables land.
Common Blink uses:
| Situation | Purpose |
|---|---|
| Chasing | Close distance and maintain pressure |
| Escaping | Break vision and reset positioning |
| Farming | Move between camps and lanes quickly |
| Split pushing | Cut waves and retreat before rotations |
You should treat Blink as both an offensive and defensive tool. Do not waste it carelessly in vision of multiple disables.
When farming, chain Blink between jungle camps and lane waves to reduce travel time. This pattern increases gold per minute without forcing risky fights.
Spell Reflection Guard (E)
This ability grants passive magic resistance and an active window that blocks and reflects targeted spells. When activated at the right moment, you punish enemies for careless spell usage.
The passive component significantly reduces incoming magic damage. Against heavy spell lineups, this alone improves your survivability in early and mid-game engagements.
The active portion requires timing. You must activate it before a targeted spell connects.
What you can reflect:
- Targeted stuns
- Silences
- Single-target nukes
- Direct disables
You cannot reflect ground-targeted abilities. Area spells still affect you normally.
Use this ability proactively against heroes who rely on single-target control. If you expect a stun, activate it early rather than reacting late.
In duels, this often forces enemies to hesitate. That hesitation creates openings for more attacks and mana burn.
Mana Collapse (R)
Your ultimate deals damage based on how much mana the target has already lost. The lower their remaining mana, the stronger the impact.
You should not use it at the start of a fight. Drain first, then finish.
Execution pattern:
- Blink onto a high-mana target.
- Attack repeatedly to burn resources.
- Cast your ultimate once their mana pool is heavily reduced.
The ability also damages nearby enemies and briefly stuns the main target. This makes it useful for interrupting channeling spells or punishing grouped opponents.
Target selection matters. Heroes with naturally large mana pools create stronger area damage when you detonate them at low mana.
You can also use it tactically to cancel Town Portal Scrolls or stop key channeling abilities. The brief stun is often enough.
Innate Trait: Mana-Based Slow
Your innate effect applies a slow when attacking enemies who have lost more than half of their mana. If they remain above 50%, this effect does not trigger.
This mechanic strengthens your mid-fight control. After several hits, enemies struggle to disengage because:
- You burn mana.
- You increase physical damage.
- You slow them once their mana drops low enough.
This creates natural synergy with your entire kit. The more you attack, the harder it becomes for opponents to escape.
You should commit to extended trades once the slow activates. That timing often marks the moment when you fully control the duel.
Against spellcasters, this effect compounds pressure. They lose mobility options, lose casting potential, and lose movement speed simultaneously.
Your kit rewards discipline. Drain first. Reposition carefully. Reflect key spells. Then secure kills when their mana pool collapses.
Anti-Mage’s Aghanim’s Shard and Scepter
Aghanim’s Shard: Enhanced Counterspell Effect
When you purchase Aghanim’s Shard, your Counterspell gains an added effect. Each time you successfully reflect a unit-targeted ability, you spawn a short-lived illusion next to the enemy caster.
This illusion lasts only a few seconds, but it immediately pressures the spellcaster and can add extra Mana Break damage in quick exchanges. It appears at the target’s location, forcing them to deal with additional right-click damage right after their spell is turned against them.
You gain the most value when opponents rely on targeted disables or nukes that you can reliably reflect. If the enemy lineup lacks consistent single-target spells, the 1,400 gold investment often provides limited impact unless you already have your core items.
Aghanim’s Scepter: Empowered Blink Strike
With Aghanim’s Scepter, your Blink grants a temporary offensive boost. After you Blink, you have a short window to land an enhanced attack.
Your next hit within that window burns an extra 20% of the target’s maximum mana and briefly prevents them from restoring mana through regeneration or other sources.
This effect strengthens your burst against high-mana heroes and reinforces your core objective: remove mana quickly, then capitalize with Mana Void.
Best Anti-Mage Ability Build
You should start by prioritizing Mana Break to control your lane. Early points let you burn enemy mana with each hit, which weakens spellcasters and improves your trading power. Take Blink at level two for safety and positioning, then continue investing in Mana Break until it is maxed.
After that, focus on maxing Blink by level nine. Lower cooldown and longer range increase your farming speed and let you shift between lanes and jungle camps without losing tempo. Add a value point in Counterspell early for magic resistance, then complete it after Blink.
Unlock Mana Void whenever available at levels 6, 12, and 18.
Talent Choices
- Level 10: +3 Health Regeneration
- Level 15: +1% Max Mana Burn
- Level 20: +0.2 Mana Void Damage Multiplier
- Level 25: -50s Mana Void Cooldown
Use attribute points in the mid and late game to scale your survivability and damage output.
Best Item Build for Anti-Mage
Anti-Mage depends on gold more than most carries. Your damage, survivability, and tempo all come from item timing rather than base abilities, so you must build with a clear progression in mind.
Lane Sustain and Starter Picks
You start the game with the goal of surviving and securing farm, not fighting. Your base stats are modest, so you need early efficiency.
Common early pickups:
- Magic Wand – Burst health and mana help you survive aggressive lanes and clutch trades.
- Wraith Band – Cheap agility and armor improve last-hitting and early skirmishes.
- Power Treads – Attack speed and attribute switching increase farming speed and survivability.
Power Treads remain the standard boots choice because you benefit heavily from attack speed and agility. Tread switching also improves mana efficiency when you Blink or cast Mana Void.
Focus on stable farm and avoid unnecessary trades. These items exist to keep you in lane long enough to reach your first major timing.
Primary Farming Investment – Battle Fury
You do not scale quickly without a farming accelerator. Battle Fury solves that problem.
The cleave damage allows you to clear creep waves and jungle camps in seconds. When you combine cleave with Blink mobility, you can rotate between lane and jungle efficiently while staying difficult to catch.
Why Battle Fury matters:
| Benefit | Impact on Gameplay |
|---|---|
| Cleave damage | Faster wave and camp clear |
| Mana regen | Sustains Blink usage |
| Bonus damage | Improves last-hitting and scaling |
Once you complete Battle Fury, shift into aggressive farming patterns. Push lanes, Blink into nearby camps, and force enemy reactions through split pressure. Your objective is to widen the net worth gap rather than join early fights.
Follow-Up Power Spike – Manta Style
Your next major purchase should almost always be Manta Style. It dramatically increases both your damage output and survivability.
The illusions apply Mana Break, which means you burn enemy mana much faster during engagements. This directly amplifies your threat against intelligence heroes and low-mana cores.
Manta Style also provides a crucial dispel. If you get silenced, you can activate Manta to remove the debuff and immediately Blink or Counterspell. Without this tool, you become vulnerable to lockdown and chain disables.
Key advantages of Manta Style:
- Illusions increase mana burn and split-push pressure
- Dispel removes silences and certain disables
- Bonus agility improves DPS and armor
With Battle Fury and Manta Style, you transition from pure farmer to active map pressure carry.
Essential Mid-to-Late Game Equipment
After your first two major items, you need combat stats to function in real fights. Choose from the following depending on the game state.
Butterfly
Butterfly gives agility, damage, attack speed, and evasion. You gain strong dueling potential against physical damage cores and improve your late-game scaling.
Pick this when enemy damage relies heavily on right-clicks and they lack true strike.
Skull Basher → Abyssal Blade
Basher provides a reliable chance to stun on hit, which helps you lock down mobile targets. Upgrade it into Abyssal Blade for a guaranteed active stun and bonus durability.
This item allows you to jump backline heroes and secure kills before they react.
Eye of Skadi
Skadi grants a large pool of stats, making you harder to burst. The slow also reduces enemy healing and mobility, improving your chase potential.
Choose Skadi when you need survivability and consistent control in extended fights.
You typically want two of these core options after Manta Style. Your selection should respond directly to enemy damage types and control tools.
Situational and Late-Game Extensions
Once your core is complete, you adapt to specific threats. These items refine your late-game presence.
- Aghanim’s Scepter – Enhances your overall toolkit and adds late-game impact, especially in drawn-out engagements.
- Monkey King Bar – Necessary against evasion-based heroes or Butterfly carriers.
- Linken’s Sphere – Blocks targeted disables and gives you time to react with Blink or Counterspell.
- Satanic – Adds strength, lifesteal, and an active dispel for sustain in man-fights.
- Disperser – Increases agility and mobility while providing an additional dispel option.
- Nullifier – Counters defensive items like Ghost Scepter and Glimmer Cape when you dive supports.
Each luxury slot answers a problem. Buy defensive tools against heavy lockdown, detection tools against evasion, and control items when you need reliable pickoff potential.
Your full build should reflect the tempo of the match. Prioritize farming speed early, survivability mid-game, and precise counters in the late game.
Playing Anti-Mage Through Each Stage of the Match
Stable Start – Focus on Lane Survival
You enter the game as one of the more fragile carry heroes in the safe lane. Your base attributes and trading ability make early skirmishes difficult, so you prioritize survival and last hits over aggression.
Your primary objective is a fast Battle Fury, ideally around the 13–15 minute mark. To reach that timing, secure consistent farm and avoid unnecessary fights. Purchasing Perseverance early helps sustain your health and mana, allowing you to remain in lane longer without frequent returns to base.
Adjust your early items based on lane pressure:
| Lane Situation | Recommended Approach |
|---|---|
| Even or winnable lane | Add Power Treads and possibly Wraith Bands for extra stats and trading power |
| Difficult or losing lane | Skip stat-heavy items and rush Battle Fury components |
Use Blink defensively if opponents pressure you. Preserve your life above all else; dying delays your core timing and weakens your mid-game transition.
Transition Phase – Accelerate Your Farm
You do not thrive in early mid-game brawls. At this stage, you remain vulnerable to burst damage and lack consistent teamfight impact. Focus on efficiency rather than confrontation.
With Blink, you clear jungle camps rapidly and move between farming locations with minimal downtime. Rotate through lane waves and neutral camps in a pattern that keeps you safe while maximizing gold intake. If the enemy lineup lacks reliable lockdown, you can cut incoming creep waves to increase pressure and create additional farm.
That said, you should not ignore every engagement. Join fights only under controlled conditions:
- The enemy dives your towers
- Skirmishes occur near your side of the map
- You can quickly eliminate a low-mana target with Mana Void
When you participate, think like a finisher. Enter late, secure a kill, then disengage. Avoid extended man-fights unless you hold a clear item advantage.
Keep your attention on completing your core items. Common progression includes:
- Battle Fury
- Power Treads
- Mobility or durability options depending on threats
- Damage scaling items
Your goal during this phase is simple: reach four strong items without falling behind in net worth.
Closing Phase – Take Control of Fights
Once you complete four or five major items, you shift from passive farming to decisive impact. At this point, you can dictate engagements through target selection and positioning.
You excel at eliminating mana-dependent heroes. Supports and spellcasters with large mana pools become high-value targets due to Mana Break and Mana Void synergy. Prioritize these heroes over durable frontliners, as you deal less efficient damage against high-armor tanks.
Adopt an in-and-out approach:
- Wait for your team to initiate.
- Blink onto a vulnerable backline hero.
- Secure the kill.
- Blink out and reset before re-engaging.
You should not start fights. Let teammates absorb the initial spells and attention. Once key abilities are used, exploit openings with precise jumps.
Maintain discipline in positioning. Your strength lies in mobility and burst, not in absorbing damage. Choose targets carefully, disengage when necessary, and re-enter when conditions favor you.
In the late game, controlled aggression wins fights.