Axe stands out as one of the most recognizable heroes in Dota 2, and you can pick him up without a steep learning curve. You play him most often in the offlane, where his durability and control tools let you shape the pace of the lane and stay relevant throughout the match.
When you choose Axe, you focus on strong initiation and forcing enemies to fight on your terms. His kit rewards decisive movement and positioning, allowing you to pressure opponents, disrupt team fights, and stay active in nearly every engagement.
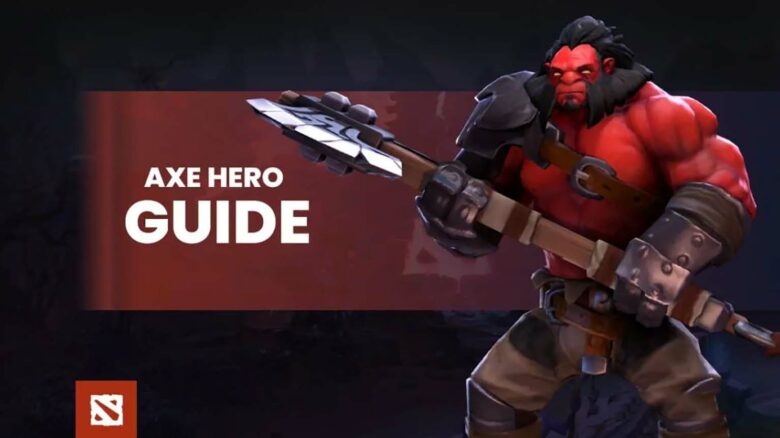
Axe Dota 2 Hero Overview
You play Axe primarily in the offlane, where he delivers consistent value from the early minutes to late-game engagements. While some players experiment with support Axe, you unlock his full potential when you give him farm priority and lane experience. The offlane role lets you pressure enemies while preparing for early rotations.
Axe brings strong area control and initiation. His toolkit forces opponents to focus him, allowing your team to reposition and follow up. You start fights on your terms and disrupt enemy formations with reliable crowd control.
You also gain access to a built-in farming mechanic that helps you clear creep waves and jungle camps efficiently. This makes gold accumulation straightforward, even if the lane feels contested.
You stay relevant throughout all game phases. Axe scales through utility and durability, so you can join fights early without waiting for an extended power spike.
How to REALLY Use Axe’s Abilities in Dota 2
You do not win games with Axe by pressing spells randomly. You win by understanding how each ability interacts with the others and by choosing the right moment to commit.
Your toolkit revolves around forcing enemies to hit you, converting those hits into pure damage, and executing targets at precise health thresholds.
Berserker’s Call (Q) – Forcing the Fight on Your Terms
You use Berserker’s Call to dictate who fights and when. When you activate it, you taunt nearby enemies, force them to attack you, and gain a burst of armor that reduces incoming physical damage.
Because affected units cannot cast spells or use items during the taunt, you effectively silence and disarm them at the same time. This control also works through debuff immunity, which lets you catch core heroes even when they activate Black King Bar.
Core uses:
- Initiation: Blink Dagger into Call remains your most reliable engage. Aim to catch multiple heroes to maximize impact.
- Interrupt timing: Punish heroes mid-cast or during channeling.
- Wave and camp control: Use the armor bonus to tank creeps safely while farming.
- Defensive peel: Save allies by forcing enemies to switch targets to you.
During lane or early skirmishes, you can Call a full creep wave plus a hero. That setup increases incoming attacks, which directly increases Counter Helix procs.
You should also think about positioning before you Blink. Standing slightly behind the enemy frontliner often lets you catch both cores and supports in the same taunt radius.
Battle Hunger (W) – Lane Pressure and Long Trades
Battle Hunger gives you steady pure damage over time and slows the target. The debuff lasts a long time, but the enemy can remove it by killing any unit, including by denying.
You should cast it when the opponent cannot easily secure a last hit. If both creep waves are healthy, or if no low-health units are nearby, they must either tank the damage or give up lane control.
Best targets in lane:
- Enemy supports who rarely take last hits.
- Off-position cores who step away from the wave.
- Heroes trapped inside Berserker’s Call.
When you Call someone, immediately apply Battle Hunger. Since they cannot attack creeps during the taunt, they cannot remove the debuff right away. This guarantees several seconds of pure damage.
At higher levels, the cooldown becomes shorter than the duration. You can reapply the spell before the previous one ends, effectively stacking pressure on a single hero.
Outside of lane, you can:
- Cast it on the largest neutral creep to speed up camp clears.
- Use it to pull neutral aggro when stacking multiple camps.
- Slow fleeing targets during chases.
Treat Battle Hunger as both harassment and farming utility. It contributes more than just chip damage.
Counter Helix (E) – Turning Enemy Attacks Into Pure Damage
Counter Helix defines how you farm and fight. After you take a set number of attacks, you spin and deal pure damage in an area around you.
This passive triggers whether you are stunned, attacking, or moving. As long as enemies keep hitting you, spins will continue.
The ability deals pure damage, so you ignore armor and magic resistance. This makes it effective against both tanky strength cores and agility carries stacking armor.
How to maximize Helix value:
- Call multiple units. More attackers mean faster procs.
- Stand inside creep waves. Let creeps accelerate your spins.
- Farm stacked camps. Large stacks generate rapid Helix triggers.
- Avoid kiting. If enemies disengage, your damage output drops sharply.
In team fights, you do not chase immediately after Call ends. Stay near enemies if possible so they keep attacking you. Your presence alone pressures melee cores who cannot ignore you.
In the jungle, you should stack camps and tank them directly. The more units attacking you, the faster you clear. This farming pattern enables early Blink timing, which unlocks your real threat.
Culling Blade (R) – Clean Execution and Momentum Control
Culling Blade functions as your execution tool. You target an enemy and attempt to finish them with a burst of pure damage.
If the target dies to the ability, several things happen:
- The cooldown resets immediately.
- You and nearby allies gain temporary movement speed and armor.
- You gain a permanent armor stack that increases your durability.
If the target survives, the spell goes on cooldown as normal.
You must learn enemy health thresholds. Track how much damage your Call, Helix, and Battle Hunger deal before committing your ultimate. Do not hesitate once the target falls into kill range.
Practical guidelines:
- Use it to secure kills rather than gamble.
- Chain executions if multiple enemies are low.
- Reset fights with the movement speed burst.
- Prioritize high-impact cores when possible, but take guaranteed kills.
The permanent armor stacks scale without limit. Every successful execution strengthens your late-game durability.
Because the damage is pure, you can finish heroes through most defensive builds. You only need correct timing.
Innate: One Man Army – Solo Durability Scaling
Your innate ability grants bonus Strength based on a percentage of your armor, but only when no allied heroes stand nearby.
This mechanic rewards isolated play. When you farm alone, push side lanes, or initiate before your team fully commits, you gain extra health and survivability.
Since the bonus scales from armor, any source of armor increases its value:
- Berserker’s Call armor bonus.
- Culling Blade permanent stacks.
- Armor items such as Assault Cuirass or Shiva’s Guard.
This interaction makes you harder to burst when you jump first. You often enter fights alone for a brief moment, which activates the bonus before allies arrive.
In split-push scenarios, the ability also helps you survive ganks. If enemies collapse on you while you are isolated, you benefit from increased Strength immediately.
You should think of One Man Army as a hidden durability amplifier. It quietly enhances your frontline role and becomes stronger as you accumulate armor throughout the match.
Axe Aghanim’s Shard and Scepter Upgrades
Aghanim’s Shard: Enhanced Berserker’s Call
When you purchase Aghanim’s Shard, your Berserker’s Call automatically applies Battle Hunger to every enemy you taunt. This adds steady damage during your initiation window and increases your overall threat in fights.
You can still cast Battle Hunger manually, and its effects stack with the Shard-triggered version. That stacking damage matters in extended engagements where enemies remain near you.
The upgrade also speeds up your farming.
- Battle Hunger spreads to lane creeps and neutral camps.
- You clear waves faster after a Call.
- You gain more pressure between fights.
In most matches, this Shard provides consistent value for its cost and fits naturally into your mid-game timing.
Aghanim’s Scepter: Counter Helix Damage Reduction
With Aghanim’s Scepter, your Counter Helix applies a stacking debuff that reduces the damage enemies deal to you. Each spin weakens affected targets, making you harder to bring down in drawn-out brawls.
This upgrade focuses on durability rather than damage. It improves your frontline presence but does not significantly change how you initiate or farm.
You usually prioritize other core items unless you already have strong momentum and want extra scaling in longer teamfights.
Optimal Skill Progression for Axe
You prioritize Counter Helix in almost every match because it delivers consistent lane pressure and accelerates your farm. Start with Battle Hunger at level 1 to trade efficiently, then invest heavily into Helix by levels 2, 3, 5, and 7. This approach strengthens your durability and punishes melee opponents who contest creeps.
Add a value point in Berserker’s Call at level 4 to unlock kill potential and defensive control. Take Culling Blade whenever it becomes available at levels 6, 12, and 18 to secure executions and reset fights.
If early Call setups look unreliable, adjust your build before level 6. You can run a 0-2-3 distribution—two points in Battle Hunger and three in Counter Helix—to focus on sustained harassment and farming instead of forced engagements.
Standard leveling outline:
- Max Counter Helix first
- Max Battle Hunger second
- Max Berserker’s Call after
- Level Culling Blade at 6 / 12 / 18
Talent priorities:
| Level | Talent Choice |
|---|---|
| 10 | +8% Movement Speed per active Battle Hunger |
| 15 | +8 Battle Hunger DPS |
| 20 | +40 Counter Helix Damage |
| 25 | +85 Berserker’s Call AoE |
This structure keeps your damage reliable, your initiation relevant, and your scaling consistent across all stages of the match.
Best Item Build for Axe in Dota 2
Early Game Foundations
You need strong lane presence to pressure opponents and secure early farm. Focus on durability, mobility, and small bursts of sustain.
- Bracer
Grants bonus Strength, health, and regeneration. You trade hits often in lane, so extra survivability lets you stay aggressive and control creep waves. - Phase Boots
These boots give movement speed, armor, and phase movement. You close gaps faster for Berserker’s Call, chase during skirmishes, and rotate between jungle camps more efficiently. - Magic Wand
Axe has limited mana in the early stages. Wand charges restore both health and mana during fights, which often allows you to cast one more Call or secure a kill with Culling Blade.
Typical early progression
| Order | Item |
|---|---|
| 1 | Bracer |
| 2 | Boots → Phase Boots |
| 3 | Magic Wand |
This setup enables you to fight early, pressure the offlane, and build momentum toward your first major item timing.
Core Power Spikes
Your mid-game revolves around forcing engagements and punishing enemies who hit you. These items define how you initiate and survive.
- Blade Mail
This item synergizes directly with your kit. When you taunt enemies with Berserker’s Call, they must attack you. Activating Blade Mail during the taunt reflects damage while Counter Helix spins, creating strong burst potential against both cores and supports. - Blink Dagger
Blink transforms you from a frontliner into a reliable initiator. The standard combo is simple and effective:
Blink → Berserker’s Call → Blade Mail.
This sequence forces engagements on your terms and punishes clustered enemies. - Aghanim’s Shard
The Shard provides a cost-efficient upgrade that increases your overall impact in fights. It improves your damage output and enhances your ability to pressure targets during extended engagements. - Black King Bar (BKB)
Axe handles physical damage well due to bonus armor during Call, but magical burst and disables can shut you down. BKB ensures you reach the center of fights, survive initial spells, and execute your initiation without interruption.
Core build flow
- Blade Mail
- Blink Dagger
- Aghanim’s Shard
- Black King Bar
This combination gives you initiation, durability, and reliable mid-game control.
Late-Game Extensions
After securing your core, adjust your build to match enemy threats and scaling needs. These options depend on lineup and tempo.
- Lotus Orb
Useful against targeted disables or single-target control. It also provides armor and mana sustain, reinforcing your front-line role. - Kaya and Sange
Adds spell amplification, Strength, and status resistance. This item increases your damage while making it harder for enemies to lock you down. - Shiva’s Guard
Grants armor and an area slow. Since you position yourself in the middle of fights, the active and aura provide consistent value against physical damage lineups. - Aghanim’s Scepter
A situational upgrade that enhances your overall utility and scaling. Consider it when you need additional team-fight presence. - Heart of Tarrasque
Choose this when you require raw durability. The massive health pool and regeneration allow you to frontline longer and recover quickly between engagements. - Refresher Orb
Extremely powerful in late-game fights. Two consecutive Berserker’s Call casts can control multiple heroes even through debuff immunity, and double Blade Mail increases punishment during forced attacks.
Situational priorities
| Enemy Threat | Recommended Option |
|---|---|
| Heavy single-target control | Lotus Orb |
| High physical damage | Shiva’s Guard |
| Long team fights | Heart of Tarrasque |
| Late-game decisive fights | Refresher Orb |
Adapt your final slots to what the match demands. Build for initiation timing first, then strengthen your durability and control to remain relevant into the late game.
How to Play Axe by Phase
Early Game Strategy
You usually start in the offlane and focus on controlling the lane through pressure and creep manipulation. Your main tool in the first levels is Battle Hunger, which you use to harass enemy heroes and disrupt their farm.
- Cast Battle Hunger on supports who struggle to secure last hits.
- If you outmatch the enemy carry, apply it to them and zone them away from the wave.
- Combine harassment with smart positioning to threaten spins from Counter Helix.
When the lane becomes difficult, shift your approach instead of forcing trades. You can drag the enemy creep wave behind their Tier 1 tower and farm it safely with Counter Helix. This tactic avoids direct lane pressure and keeps your gold income steady.
Ask your support to stack nearby neutral camps whenever possible. You clear stacked camps efficiently by pulling creeps together and using Berserker’s Call to trigger multiple Counter Helix spins. Stacks help you recover from a weak lane and accelerate your item timing.
Mid Game Approach
Your game opens up once you complete Blink Dagger and Blade Mail. These items allow you to dictate fights instead of reacting to them.
Your standard initiation sequence looks like this:
- Blink into position.
- Activate Blade Mail immediately.
- Use Berserker’s Call on one or more targets.
- Let your team follow up with damage.
- Finish low-health enemies with Culling Blade.
Prioritize isolated targets to secure clean pickoffs. Core heroes are ideal because removing them weakens the enemy’s damage output and map control. However, take support kills if they are available and safe.
Positioning matters during this stage. Try to catch multiple units in your Call, including both heroes and creep waves. More units attacking you means more Counter Helix procs, which increases your damage output. Side lanes often give you better opportunities because carries farm near creep waves and can get caught off guard.
Each successful Culling Blade execution increases your long-term impact. Look for repeated skirmishes to build momentum rather than forcing unnecessary five-on-five fights.
Late Game Execution
As the game progresses, enemies gain more durability and defensive tools. You no longer expect to eliminate heroes instantly with a single initiation. Instead, you play more patiently and choose your moments carefully.
Focus on the enemy hero with the highest physical damage. When you Call a strong right-click core while Blade Mail is active, they often harm themselves significantly. Removing or weakening this hero shifts the fight in your favor.
Your cooldowns remain relatively short compared to many other initiators. This flexibility allows you to:
- Blink + Call, absorb damage, and disengage.
- Wait briefly for cooldowns to reset.
- Re-enter the fight for a second round of control.
You do not need to fully commit every time you jump in. Chip away at key targets, force defensive reactions, and reset when needed. By repeating controlled initiations and targeting priority heroes, you maintain pressure and create openings for your team to secure decisive kills.