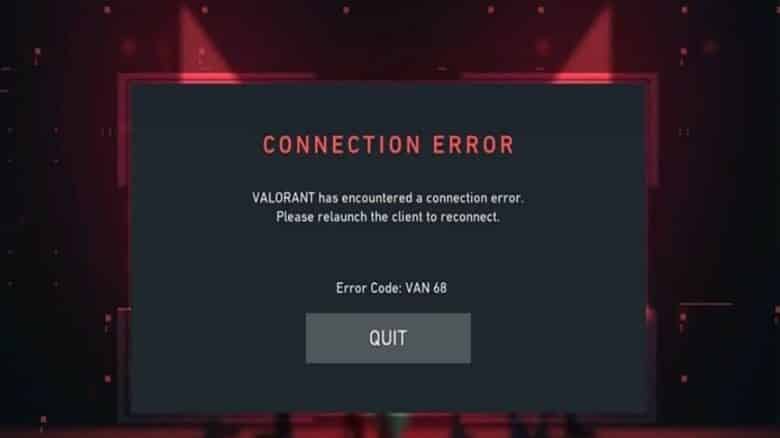
The VAN 68 error in Valorant is a common connection issue that prevents players from accessing the game or joining matches. When this error appears, it signals that the player’s system cannot properly connect to Riot’s servers, interrupting communication between the game client and the network. Because it stems from Vanguard, Valorant’s anti-cheat system, the issue often points to a disruption in how the software interacts with the servers.
This error can occur for several reasons, including temporary server outages or problems with the player’s own network configuration. While the message may seem alarming, the underlying cause is often straightforward and can usually be resolved with basic troubleshooting steps. Understanding what triggers VAN 68 helps players restore stable connectivity and return to gameplay more quickly.
How to Fix Valorant VAN 68 Error?
The VAN 68 error in Valorant usually indicates a connection failure between the system and Riot’s servers. It can appear when the client cannot sync properly with the game’s authentication or Vanguard service. The following steps outline practical methods to restore connectivity and get the game running again.
1. Verify Riot Server Availability
Before adjusting any system settings, check whether Riot’s servers are functioning. Players can visit status.riotgames.com or view Riot’s official social media updates for maintenance or outage notifications. If servers are down, no local fixes will work until Riot resolves the issue.
2. Restart the System and Network Devices
A full restart can clear temporary network or memory errors. Close Valorant and the Riot Client completely, then reboot the PC. Afterward, power cycle both the router and modem. Unplug them for about 30 to 60 seconds, reconnect the modem first, wait until it stabilizes, and then reconnect the router. This refreshes the connection to the Internet Service Provider (ISP).
3. Disable VPN and Proxy Connections
VPNs and proxies may interfere with Riot’s authentication servers. Disable any active VPN software before opening Valorant. To turn off proxy settings in Windows:
- Open Settings → Network & Internet → Proxy.
- Switch off both Automatically detect settings and Use a proxy server.
- Save the changes and restart the game client.
4. Clear the DNS Cache
Flushing the DNS cache removes outdated or incorrect network entries that may block proper connections.
- Press the Windows key, type cmd, and right-click Command Prompt → Run as administrator.
- In the command window, type
ipconfig /flushdnsand press Enter. - When the message Successfully flushed the DNS Resolver Cache appears, restart the computer and try launching Valorant again.
5. Reset Network Socket Settings (Winsock Reset)
Winsock manages how Windows communicates with network services. Resetting it can fix corrupted configurations.
- Open Command Prompt as administrator.
- Type
netsh winsock resetand press Enter. - After the confirmation message, restart the PC to apply the reset.
6. Modify DNS Server Addresses
Switching to a more stable DNS provider can improve the connection between the system and Riot’s servers.
| DNS Provider | Primary Address | Secondary Address |
|---|---|---|
| Cloudflare | 1.1.1.1 | 1.0.0.1 |
| 8.8.8.8 | 8.8.4.4 |
To change DNS settings:
- Go to Settings → Network & Internet → Ethernet (or Wi-Fi).
- Select Edit DNS server assignment → Manual.
- Enable IPv4 and enter the preferred DNS addresses.
- Save the configuration and relaunch Valorant to test connectivity.
7. Allow Valorant and Riot Services Through the Firewall
Windows Firewall may block Valorant or Vanguard from connecting properly. Allowing them through ensures uninterrupted communication.
- Open Windows Defender Firewall from the Start menu.
- Select Allow an app through firewall → Change settings.
- Remove outdated Valorant or Riot Client entries.
- Click Allow another app and navigate to:
C:\Riot Games\VALORANT\live\ShooterGame\Binaries\Win64\
Select VALORANT-Win64-Shipping.exe and add it. - Tick both Private and Public network boxes.
- Repeat for Riot Vanguard:
C:\Program Files\Riot Vanguard\vgc.exe - Add the Riot Client in the same way.
- Click OK and restart the computer to apply the changes.
8. Disable IPv6
Some users experience fewer connection issues when IPv6 is turned off.
- Press Windows + X and select Network Connections.
- Choose Change adapter options.
- Right-click the active network (Ethernet or Wi-Fi) → Properties.
- Uncheck Internet Protocol Version 6 (TCP/IPv6).
- Click OK and restart the PC.
9. Reinstall Riot Vanguard
If Vanguard becomes corrupted, reinstalling it may restore secure communication between the system and Riot’s servers.
- Press the Windows key, type Add or remove programs, and open it.
- Locate Riot Vanguard and select Uninstall.
- Confirm any prompts that appear and allow changes to the device.
- Restart the computer.
- Open the Riot Client; it will automatically prompt the installation of Vanguard.
- Follow the instructions and restart once more after installation completes.
10. Repair Game Files
Corrupted or missing files can lead to failed authentication attempts and trigger the VAN 68 code.
- Open the Riot Client.
- Click the profile icon → Settings.
- Select Valorant from the game list.
- Click Repair.
- Wait while the client scans and replaces damaged files.
- Restart the Riot Client and test the game again.
11. Review Network Configuration
If issues persist, verify that no third-party security software or network filters are blocking Riot-related services. Some antivirus tools or parental controls can restrict outbound connections. Temporarily disable them to check if the problem clears, then re-enable with proper exceptions.
12. Confirm System Time and Date
Incorrect time synchronization can prevent authentication. Ensure the system clock matches the correct time zone.
- Right-click the system clock → Adjust date and time.
- Enable Set time automatically and Set time zone automatically.
- Restart the Riot Client.
13. Use a Wired Connection
Wireless instability can cause packet loss or short disconnections. Connecting through Ethernet provides a more stable link to Riot’s servers. If a wired connection is unavailable, move closer to the router and reduce interference from other devices.
14. Test Network Latency
To identify potential delays, open Command Prompt and run:
ping 1.1.1.1
ping 8.8.8.8
Compare the response times. High latency or packet loss may indicate ISP-related issues that require contacting support.
15. Reinstall Valorant (Last Resort)
If all previous steps fail, a clean reinstall may resolve persistent errors.
- Uninstall Valorant and Riot Vanguard completely.
- Delete remaining folders in
C:\Riot Games\andC:\Program Files\Riot Vanguard\. - Restart the system.
- Download the latest installer from Riot’s official website and reinstall both the client and game.
16. Example Troubleshooting Checklist
| Step | Action | Purpose |
|---|---|---|
| 1 | Check Riot server status | Verify if the issue is global |
| 2 | Restart PC and router | Refresh network connection |
| 3 | Disable VPN/Proxy | Prevent routing conflicts |
| 4 | Flush DNS / Reset Winsock | Clear cached or corrupted settings |
| 5 | Change DNS servers | Improve connection reliability |
| 6 | Allow apps through firewall | Ensure Riot services can connect |
| 7 | Reinstall Vanguard or game | Replace corrupted files |
Following these actions methodically increases the likelihood of resolving the VAN 68 error. Each step targets a different layer of the network or system configuration, helping isolate the cause and restore stable access to Valorant.